Table of Contents
Want to customize your Galaxy A7? Then follow this Guide To Install TWRP Recovery And Root Galaxy A7 A720F/DS. If you want to install custom ROMs, get root access and much more features then you should install TWRP. Follow the step by step guide on how to install TWRP recovery on Samsung Galaxy A7.
Supported Devices
- Samsung Galaxy A7 A720F/DS
Preparation
- Charge Your Device.
- Backup Phone Apps, Contacts, SMS.
- Enable developer options.
Go To Settings -> About Phone -> Tap On “Build Number” 7 Times To Enable Developer Options.
- Enable USB Debugging.
Go To Your Settings -> Developer Options -> Tick The “Usb Debugging” Checkbox.
- Enable OEM Unlock.
Go To Your Settings -> Developer Options -> Tick The“Oem Unlock” Check the box
- Install Samsung USB Driver
- Download Latest Odin Tool From Here.
- Download TWRP img, Super-Su Zip.
- Read Guide. for TWRP and Root Samsung Galaxy A7.
Download
- Download TWRP Recovery below:
Guide To Install TWRP On Galaxy A7 A720F/DS
- Download Odin And Unzip Odin-v3.*.* and Twrp.tar.md5 file.
- Run Odin3 vx.xx.exe.
- Switch Off Your A7.
- Turn Your Phone Into Download Mode By (Volume Down + Home + Power buttons)
Press Volume Up to acknowledge the warning Then Phone Will Turn Download Mode
- Connect Your Phone With Pc Via USB
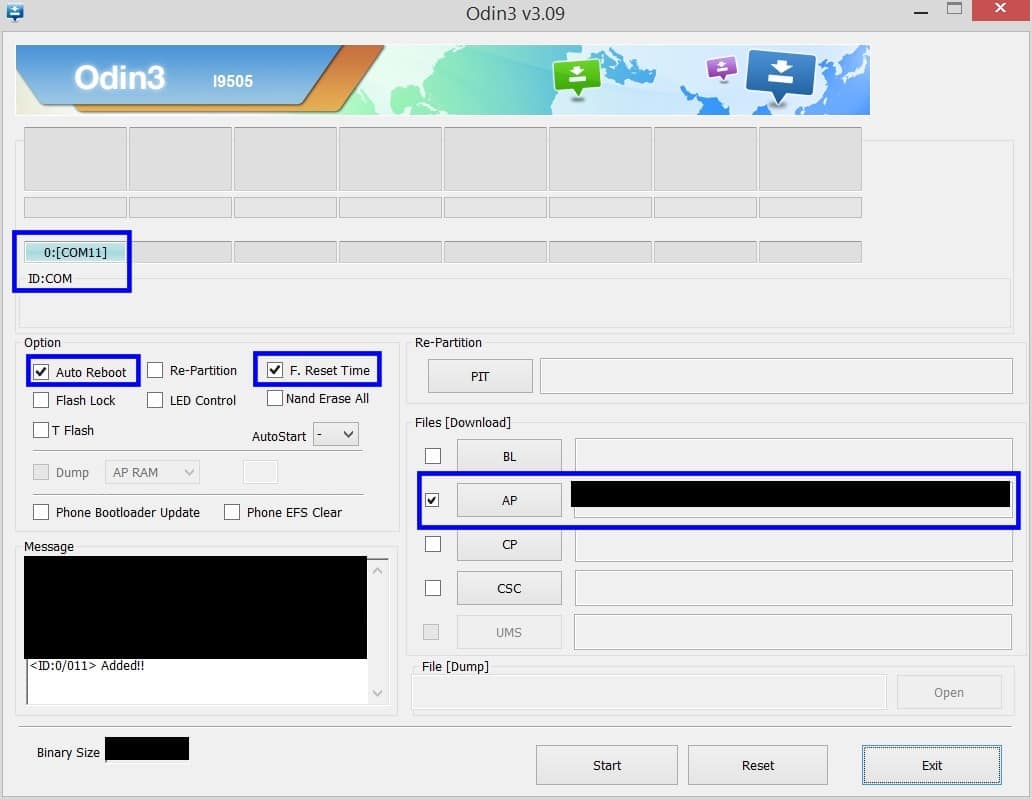
- Odin Will Detect Your Phone
- That Is, Check The Ap Box, Add The TWRP File. (Do Not Extract It)
- Check Auto Reboot And F.Reset Time Options.
- See The Screenshot.

- Now, Click Start Button To Begin The Installation Process.


